Business Verification
Has your ad account ever been blocked by Facebook for no apparent reason? Welcome to the club. Read on.
Never had this happen to you and would like to continue the streak? Then this may and should be of interest to you.
In last week's Newsletter, we talked about domain verification for our business's website, something that from now on (thanks to iOS 14) is practically mandatory for anyone who wants to use Facebook Ads optimally.
Today we talk about business verification, which while not as urgent as the above, we strongly recommend that it be carried out to reduce the possibility of us suffering unnecessarily at the hands of Facebook's capricious algorithm, in charge of preventive blocking, also known as "just in case blocking".
To give you an idea, business verification would be like wearing a reflective yellow vest, as journalists do in the middle of a protest that has gotten out of hand and with riot police handing out "love" all over the place.
That being said, if you're messing up and going against Facebook's ad policy, the "yellow vest" isn't going to save you.
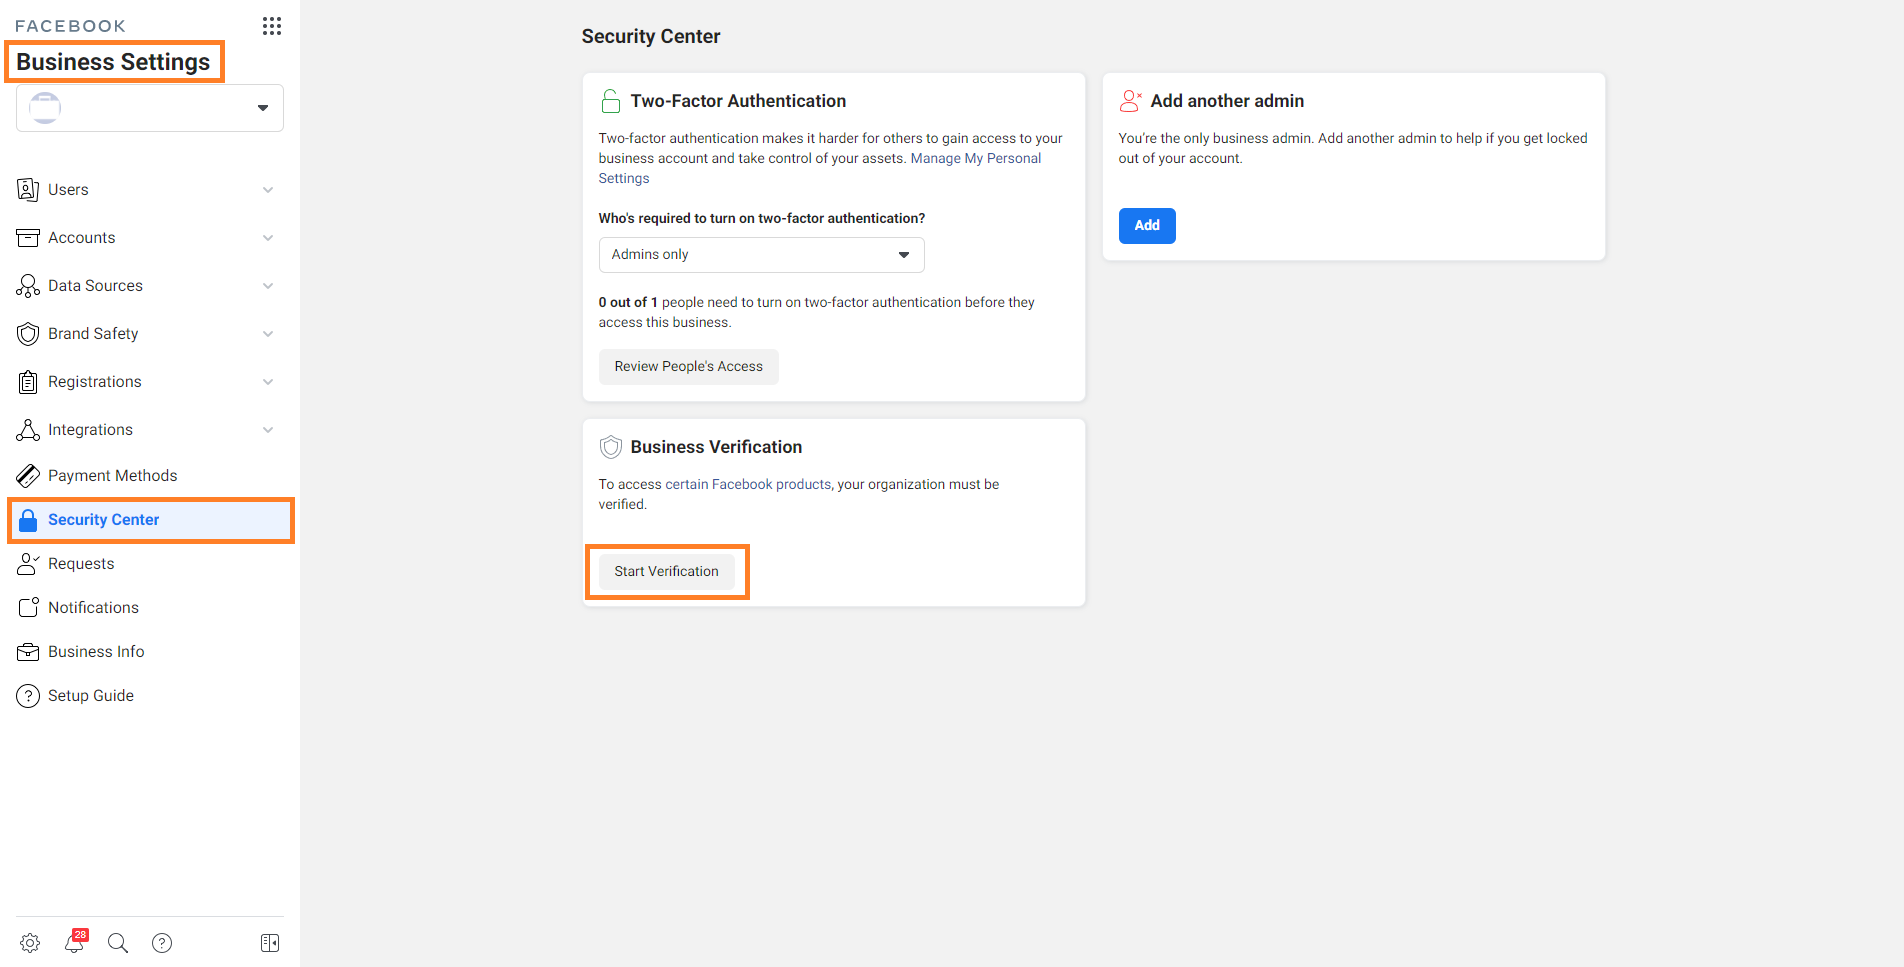
To start the process, we go to Business Settings > Security Center > Start Verification
Many of those who have already tried it will be wondering "how on earth did you get the clickable verification start option to appear?" and that's because most businesses will see such an option, but won't have it available to click on.
Facebook says about it "Remember: Not all businesses need to go through business verification, and you may not be able to verify your business unless you need access to certain Facebook products and developer features."
If you want to go straight to the source, you have the official article here, but Facebook is not at all clear about the procedure (as usual). Seriously, if you ever want to make good tutorials, please don't follow Facebook's example, leaving instructions open to user interpretation and imagination.
Back to the topic. There is a shortcut to make Start verification appear clickable - becoming a Developer. Trust us, it's pretty simple:
1. Go to https://developers.facebook.com/apps/
We will end up on this page and instead of MyApps, we will see "Get Started". Click on it.

2. Click without fear on "Create App"
Creating an app here is a process that has one thing in common with New Year's resolutions, and that is that no one can tell us that we will not carry them out... sooner or later.

3. Choose any of the options
They irrelevant to our goal, so go ahead with the one that is most appealing to you.

4. Fill the form and select your Business Manager
5. Sorry robots, you can go no further. Humans, continue.

6. Once we get to this window, time to celebrate.
When we have finished celebrating, we close this page and return to the Start Verification page, which now should be selectable.

7. Start the Business Verification process
Important! Do not put false information about your business as it may have repercussions. We fill in everything that Facebook asks for in each step and give them the documents they may ask for.

Once we have sent documentation about our business to Facebook, we will have to wait for their approval to finish the process. Click here to find out what kind of documentation they accept.
And that's it! It's a shame that you have to go to such lengths to avoid being punished without sinning, but that's the way things are. The positive takeaway is that if we do our homework, we gain a competitive advantage over those who give up at the first attempt.

Join FREE FB & IG Ads Webinar by Patrick Wind!
Learn the exact Bid Strategies, Audiences & Ads that Patrick has applied to over 120+ Brands to generate over €10,000,000 with their Facebook & Instagram Ads.
